Updated September 13, 2024
A traveller’s emergency contact card is a physical credit-card-sized card containing emergency contact numbers and related details. With a few cards scattered throughout your belongings, emergency contact information is within easy reach at all times.
Reasons to pack an emergency contact card
- If you lose your credit card, you’ll need to report it as lost or stolen without delay.
- If you lose your wallet, a Good Samaritan will want to contact you without delay.
- If you require emergency medical treatment, someone needs to call the insurance plan administrator. Many policies specify this needs to be done before seeking treatment.
- You need assistance from your country’s nearest embassy or consulate. What’s the toll-free 24-hour number for consular services?
- There may be a situation when your ICE (In Case of Emergency) contact person needs to be called. You know the person’s name and number, but you might not be in a position to convey that information to someone else.
It helps to have this type of information at your fingertips, or available to others if you’re not able to speak for yourself.
How to make a traveller’s emergency contact card
Follow these five easy steps to make a DIY version of an emergency contact card.
Step 1: Find a laminating tool
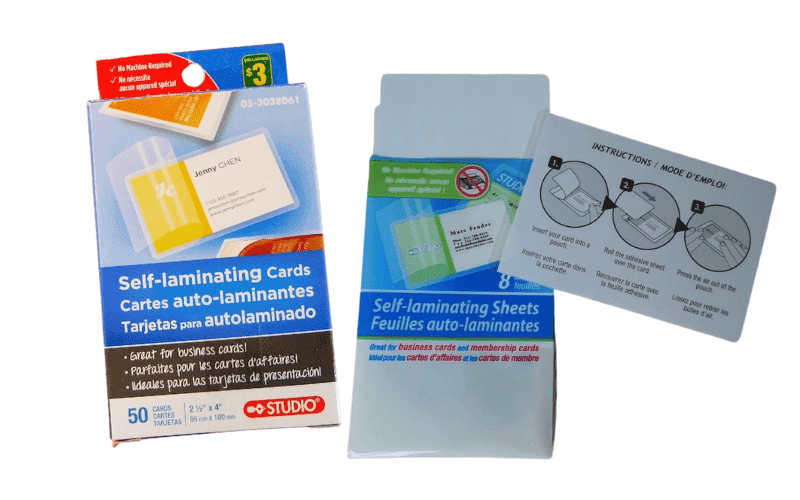
The card will last longer if it’s laminated. Information could change from time to time, so the cheaper and more convenient option may be to buy a self-laminating tool from your local dollar store. Look for a pack of self-laminating cards or a self-laminating luggage tag kit. Self-laminating cards are also available online.
Step 2: Identify what to put on the card
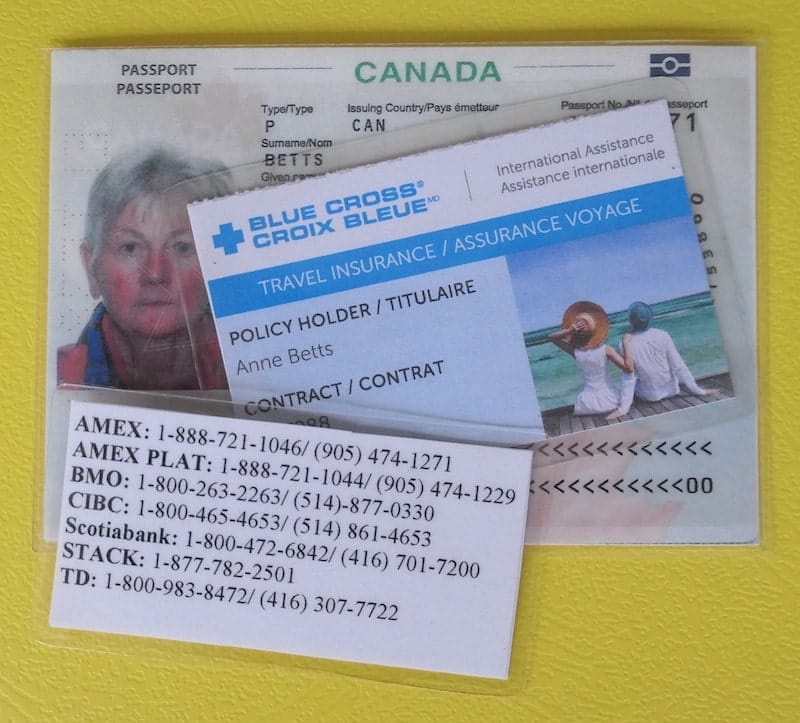
Gather your financial cards, passport, insurance documents, information on consular services, and anything else with information that’s handy to have in an emergency. Here are some suggestions on what to include:
- your name
- country of citizenship and passport number
- your phone number and email address
- name and telephone number of at least one ICE contact
- toll-free numbers of the financial institutions that issued your debit and credit cards
- 24-hour number for consular services
- name of the company or administrator of your emergency medical insurance, policy number, and toll-free number.
Step 3: Create a document containing the information
If you have a lot of information to include, or prefer larger print, there’s always the option to use both sides of the card.
Insert text to create a one-sided or two-sided card. Copy and paste the text as many times as it takes to create the number of cards you’d like to make. I find a table in Microsoft Word works well as it usually means that just one page of paper needs to be printed and the borders of the table are easy to cut with scissors.
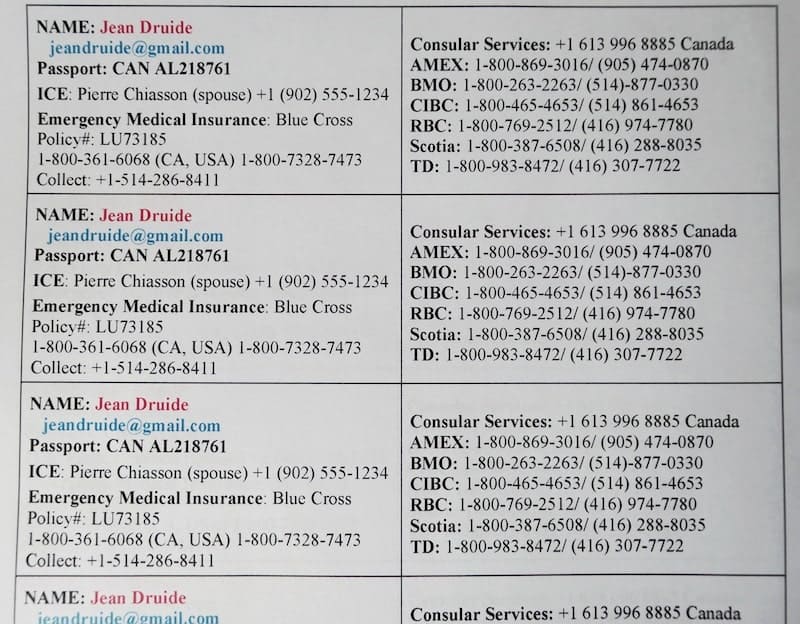
If you’re adept at word processing, you’ll nail the draft on your first try. Your travel wallet is a logical place to carry one of the copies. When sizing things up, there will be a slight overlap of the laminating material around the edges so take that into consideration.
Step 4: Print one copy
Print one copy and assess the size of each card. Place a laminating pocket over the text to assess the fit. Go ahead and laminate one card to make sure it fits in the laminating pocket and your travel wallet. If not, you might need to change the font type or size, and print another copy. If it’s a good fit, print as many copies as you need.
Cut along the borders of the table. For a double-sided card, fold along the vertical border separating the information destined for each side of the card. A quick swipe with a glue stick will keep both sides of the card aligned during the laminating step.
Step 5: Laminate the desired number of cards
You’ll want to strategically distribute your cards throughout your belongings. Keep in mind that these places aren’t just for you to be able to put your hands on a card in a hurry. There may be a time when you’re not in a position to do so. A travelling companion, first responder, or Good Samaritan needs to be able to readily access the information so place the cards where they can be found. Here are some suggestions:
- travel wallet
- pocket in a phone wallet case
- passport sleeve
- security belt or wallet
- identity pocket in outerwear
- outer pocket of each bag
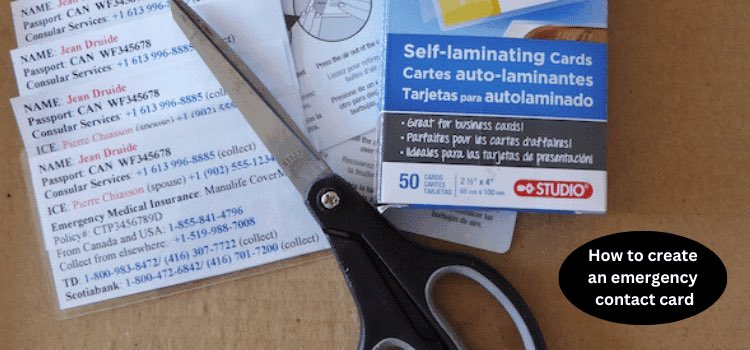
Cut out each card and laminate it. The self-laminating pockets are small enough that it’s an easy task to press down on the laminating film without creating wrinkles or bubbles.
Other thoughts
Another approach is to have a business centre or office supply depot handle Steps 4 and 5. They’ll have a colour printer, and paper cutting and laminating facilities. For a nominal fee, they’ll get the job done.
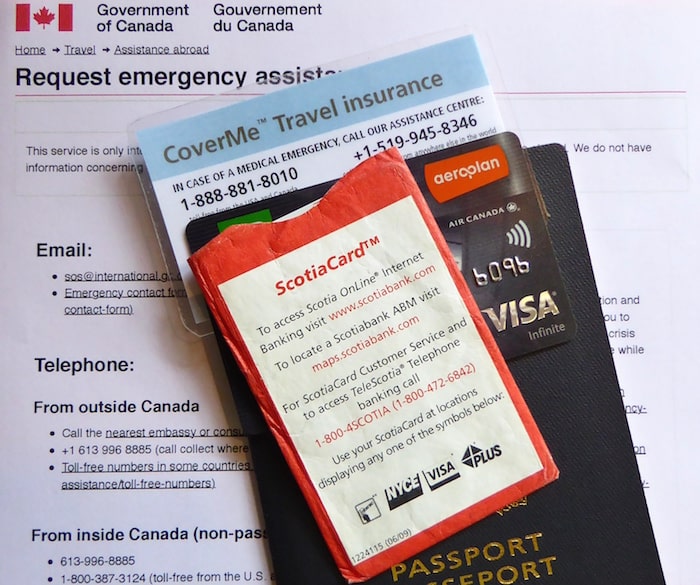
Did your travel insurance provider send you a card containing your policy number and telephone number to call in an emergency? If so, laminate it and slip it into your wallet. Another suggestion is to carry laminated copies of the information page of your passport.
For more information on how to be prepared to deal with emergency situations while travelling, you might be interested in the following related posts:
- Emergency preparedness toolkit for travellers: 25 proven ideas
- 9 Tested reasons to carry laminated copies of your passport
- 10 Essentials of packing for a travel medical emergency
- 12 Must-have features of a phone wallet case for travel
- What’s in your travel wallet? 12 Tips for keeping your stuff safe
- A Simple emergency ID bracelet for travellers saves lives
- 16 Tips on how to assemble a perfect travel first-aid kit
If you found this post helpful, please share it by selecting one or more social media buttons.
Will you be making a traveller’s emergency contact card? If so, what information will you include? If not, what are the key elements of the system you have for storing and accessing emergency contact information? Please share your thoughts in the comments. Thank you.
Care to pin for later?




Hi Anne,
The emergency contact card is a great idea! During my travels, I’ve seen situations where people had travel insurance but couldn’t contact the company themselves as they were hospitalized. It then becomes essential for someone else to be able to communicate with third parties on your behalf.
You’ve inspired me to prepare an emergency contact card. In terms of additional information, I added my blood type in brackets next to my name.
Cheers,
Dominique
That’s wonderful, Dominique. I hope you don’t need it on your trip to South America. Safe travels, and I’ll look forward to following your adventures on your blog.
Anne Betts recently posted…MacGyver kit for travellers
That is such a great idea! I had somehow never considered this before! Will definitely be making them for us!!
Deb recently posted…Camping Essentials: The Gear You Should Have
This is SUCH a good idea. I’ve never thought about this, just assuming everything I need is in my purse and wallet, but you’ve shown me there are so many important pieces of info that would really help in an emergency abroad!
This is such a great idea, I have been in the position before where I needed to access my travel insurance quickly and could not find the email. Something so simple can make such a difference. I will be sharing this post with my friends and family. It is so important.
This is a genius idea! I don’t know why I haven’t thought of this myself! What a handy little tool to have with you in case of emergencies! I’m going to make a bunch of these to have on hand on my future travels. Thanks for the great guide!
Ahh, this is such a smart idea! I definitely need to make one of these — was planning on using this weekend to catch up on all “life admin” stuff so I’ll add this to the list too!
This is SUCH a good idea! I can’t believe I never thought to do this, especially since I often travel alone. I’lld definitely be making myself one of these cards for my next trip. Thank you for the great tip!
This is one of those things that I don’t think about until it’s too late. I’m on it, right now.
This post is really great! And a good reminder. I’ll definitely be making one for my next trip. Thank you.
Véro recently posted…What it’s like working in a Spanish school
This is definitely a great idea and something I think everyone should do before they go on a trip.
I had honestly never considered making something like this, but this can be so helpful. I had to visit a US embassy in Santiago after being pick-pocketed and losing my passport, and it was super hard to find them and connect with limited wifi, so having their toll-free number would have been helpful. I also have no idea what my insurance information is… I’ll have to make some of these and laminate them at my partner’s office. Thanks for all the easy-to-follow tips.
Susanna recently posted…What is Ecotourism? The Good, The Bad, and the Importance of Sustainable Ecotourism
What an important thing to have when traveling! Better to have all the essential information at hand in case of emergencies or unexpected events. Need to make one before my next trip!
Brilliant. So simple and USEFUL and I never thought of it. Definitely doing this before my next overseas trip. Thanks
This is an amazing idea. I’ll absolutely have to make one for my family. Didn’t even cross my mind to do this. Thanks for the idea!
This is SUCH a great idea! I’ve been a professional traveller for years and have never made one myself – I’ve always used ones from my insurance or just hoped I’d not get into an emergency. Definitely making one for my next adventures!
I think this is a great idea. One question though:
Is this dangerous if someone steals your wallet and then has all your info?
It’s definitely a consideration. My info on the emergency contact card is limited. I like to think that if I can’t speak for myself, my citizenship and emergency medical insurance policy information is more important to first responders than it is to an identity thief. I’ve read of horror stories of travellers ending up in an emergency room of a hospital and not having proof of insurance coverage. Read: delays and possible treatment denied. I’ve also seen examples of travellers who’ve had their passport stolen at the scene of an accident and had it not been for other information indicating their citizenship, consular support and transportation to another country would not have been possible. As you’re suggesting, it’s a balancing act between protecting personal information while at the same time providing helpers (travelling companions, Good Samaritans, first responders, consular staff) with information to provide assistance in an emergency.