Updated July 28, 2024
Are your trips through airport security angst-free and uneventful? Do you factor screening into your packing regimen? If the answer is “yes” to both of these questions, it sounds like you know how to navigate airport security like a pro. If you’ve answered “no” or “occasionally,” read on for my top 20 tips on how to prepare for airport security.
Table of Contents
- How to prepare for airport security
- 1. Apply for trusted traveller status
- 2. Check carry-on limits
- 3. Research prohibited items
- 4. Read up on liquids, aerosols, gels, creams, and pastes
- 5. Plan duty-free purchases
- 6. Add airport screening to your packing list
- 7. Digital or printed boarding pass?
- 8. Organize a way to access your documents quickly
- 9. Dress with security in mind
- 10. Bring a positive attitude
- 11. Develop a mental checklist
- 12. Arrive with plenty of time to spare
- 13. Have travel documents ready
- 14. Use queue time profitably
- 15. Have your 3-1-1 bag accessible
- 16. Limit individual items on the conveyor belt
- 17. Count ’em
- 18. Determine the order for placing items
- 19. Work with a buddy
- 20. Stay alert
How to prepare for airport security
1. Apply for trusted traveller status
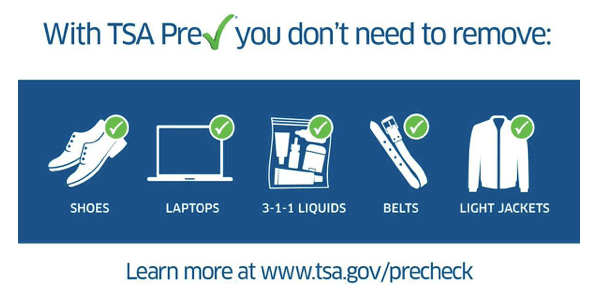
Investigate what program you’re eligible for given your citizenship or resident status. For example, my NEXUS card usually ensures a speedy trip through security, customs, and immigration at Canadian and U.S. borders. It’s saved me countless hours because when it comes to airport security, there are dedicated screening lanes for cardholders. When travelling in the USA, the accompanying TSA Pre✓ ® (Transportation Security Administration) special privileges include not having to remove shoes, belts, laptops, and ‘3-1-1 bags.’ As a Canadian citizen, it’s the best $50 in travel money I’ve ever spent.
2. Check carry-on limits
List the dimensions of your standard and personal carry-on luggage, and carry them in a notes app for easy reference. Add a section for the free carry-on baggage allowance of your preferred airlines. When booking travel, head over to the baggage allowance page, check the carry-on allowances, and add them to your list. It’s too late after you breeze through security with your two carry-on bags, only to find out at the gate that the airline you’ve booked has a one-bag limit of 8 kg (17.6 lb).
3. Research prohibited items
What’s acceptable in one jurisdiction may not be acceptable in another. Here are a few examples.
- Pepper spray might be legal in your country, but if it’s found at a screening checkpoint in another, agents may be required to call the police.
- My folding scissors that passed inspection at countless North American and European screening points were confiscated in Singapore. It might have been a case of an overzealous or misinformed employee. I don’t know; I had failed to check beforehand.
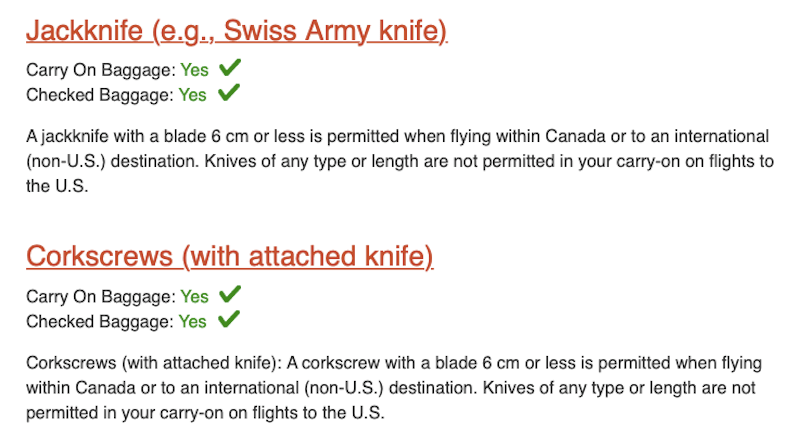
- A small knife is a handy travelling tool. I notice Canada recently allowed knives with a blade not exceeding 6 cm (2 in). Before packing your favourite folding knife in your carry on, it would pay to check if it’s allowable in all countries on your itinerary.
It takes a few moments to check. Google “prohibited items” with the name of the country and chances are you’ll be presented with a handy list.
4. Read up on liquids, aerosols, gels, creams, and pastes
Most travellers are aware of the 100-ml (3.4-oz) limit on liquids, aerosols, gels, creams, and pastes in cabin baggage. In some countries, it’s sometimes called the ‘3-1-1 rule.’ The ‘3‘ refers to 3.4 oz (100 ml). Each ‘1’ refers to 1 bag (per person) not exceeding 1 litre (or 1 quart). All liquids, aerosols, gels, creams, and pastes must fit in a traveller’s ‘3-1-1 bag.’ It applies to carry-on luggage only.
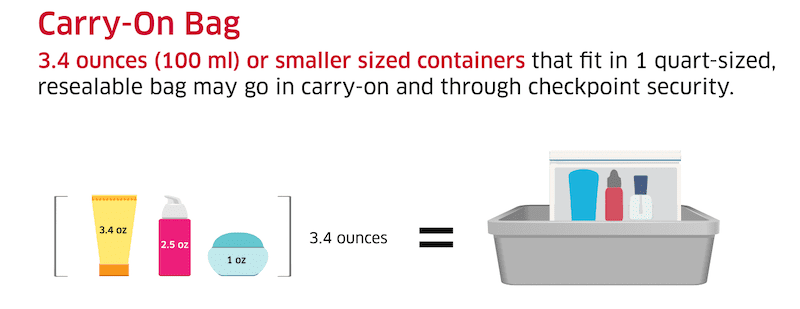
The 100-ml (3.4-oz) limit may be exceeded in specific cases. Examples include saline solution for contact lenses, breast milk and baby formula, distilled water for medical devices, and frozen gels or liquids in ice packs used for cooling medication. They’ll need to be presented for examination, along with the required supporting documentation. Check each jurisdiction’s website in advance for the specifics of what’s permitted in your carry on, and what documentation, if any, you’ll need. If documentation isn’t required, having it may speed the process.
Starting in late 2017, many countries introduced restrictions on carrying powder-like substances in carry-on luggage. Limits of 12 oz (350 ml) apply to products such as baby powder, bath salts, coffee, spices, foot powder, and sand. However, it pays to check.
5. Plan duty-free purchases
When it comes to liquids such as perfume and alcohol, purchasing duty-free items will require some planning.
As a general rule, duty-free liquids exceeding 3.4 oz (100 ml) can be carried into the cabin as long as they’re purchased at a duty-free shop and placed in special tamper-evident bags. Liquids not in these bags must be stowed in checked baggage. If you have a connecting flight that involves passing through security at the connecting airport, you’ll need to pack them in a checked bag.
6. Add airport screening to your packing list
When assembling a packing list, choose categories that make sense, and with airport security in mind. For some travellers, it means devoting a special category to what will be packed in a personal carry on, and what will be worn during the flight. For me, it involves listing all liquids and gels in a differently coloured font. It removes the guesswork associated with remembering what qualifies and what doesn’t.
If taking gifts, remember the 3-1-1 rule applies to ALL liquids, aerosols, gels, creams, and pastes in carry-on luggage. That maple syrup or peanut butter you’re taking to your host will have to go in checked luggage if it exceeds 100 ml (3.4 oz). Also, don’t wrap any gifts. Pack the wrapping materials, and attend to this task at your destination. And don’t lock your bags. Pack your lock or cable ties separately and secure your bags at the gate.
7. Digital or printed boarding pass?
I once arrived at an airport check-in kiosk to find the entire system down. You can imagine the delays involved in manually processing a long line of passengers by a limited number of agents.
As most airlines offer online check-in at least 24 hours before departure, it’s a good idea to do so. It’s one less task for the airport.
You’ll need to present your boarding pass at least three times before boarding your flight — entering the screening area, at the screening checkpoint, and to the agent at the gate to the aircraft.
Should you choose a digital or paper copy? I prefer a paper version. Presenting the digital version means I need to keep my phone charged and accessible, and present the right screen on demand at least three times. I’d much rather pack my phone away in a secure place and carry a paper copy. Unlike my mobile device, I can take the paper copy through the scanner.
Check your boarding pass for clues that you’ve been selected in advance for secondary screening. If you’re travelling within, to, or from the USA, a tell-tale sign is the appearance of “SSSS” (Secondary Security Screening Selection) on your boarding pass.
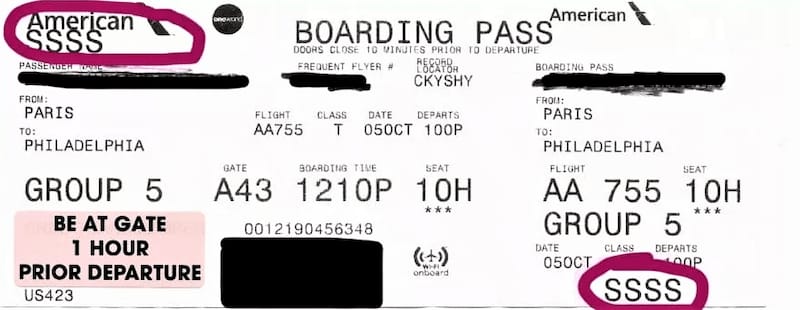 Photo credit: Susan Decouteau-Ferrier, Gen X Traveler
8. Organize a way to access your documents quickly
It seems like two hands are never enough to manage bags (and perhaps children) and have documents ready to present on demand. A document holder is a way to keep passports, trusted traveller cards, boarding passes, and other travel documents in one place. Take something out, put it back where it belongs. But where do you put the document holder if you need to answer your phone, pick up a bag, or push a stroller? Times like these beg for a hands-free solution.
There are document holders with wrist or neck straps. Vests and jackets loaded with pockets are another possibility. My preference is a small packable crossbody purse.
9. Dress with security in mind
Seconds count at the security checkpoint, both for you and the people behind you. You’ll be asked to remove your jacket and perhaps other outer layers. Wear something that’s easy to take off. Avoid clothing with metal snaps, buttons, or studs that will activate metal detectors. Your belt may also have to come off, unless it has a plastic clasp. Limit jewellery to small earrings, rings, and watches.
Wear shoes without metal arches, buckles, steel toes, or shanks. If you’re wearing your heaviest and bulkiest gear on the plane, organize your boots so they can be slipped on and off easily. In the interests of hygiene, don’t forget the socks. If it’s a long flight, chances are you’re wearing compression socks. If you haven’t yet looked into the advantages, you might want to do so. Compression socks could save your life.
10. Bring a positive attitude
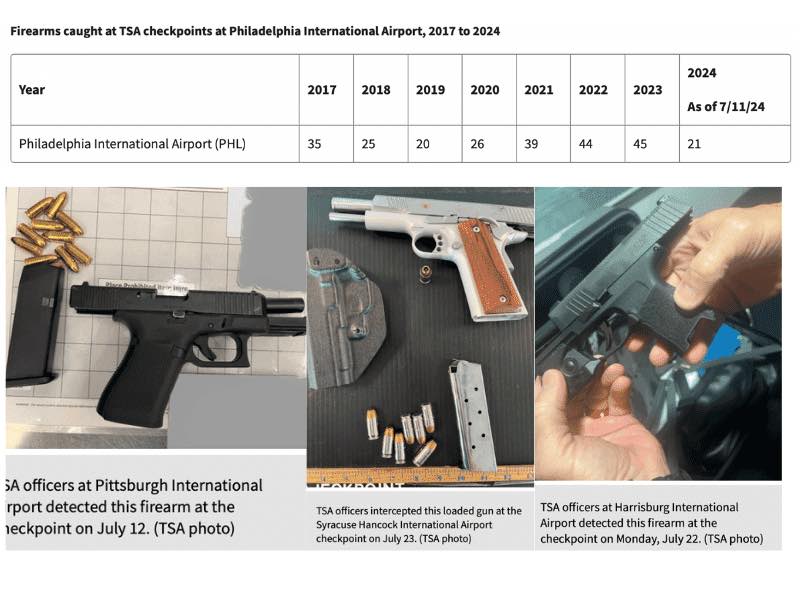
Navigating an airport can be stressful. It may sound trite to suggest bringing a positive attitude to the screening area, but it’s definitely a place where being calm and polite will work in your favour. Screening agents work to keep us safe. If you’re selected for random screening, or a closer examination of your bag, cooperate with a smile. Take comfort in the fact they’re doing the same with other passengers, and confiscating what might be harmful. Check out the TSA blog of the Transportation Security Administration in the U.S. for a mind-blowing insight into some of the dangerous stuff people try to bring on planes.
11. Develop a mental checklist
Before entering the screening area, it might help to work through your own checklist of what you need to have organized. It might look something like this:
- Water bottle empty?
- Outerwear pockets all zipped?
- Other pockets in clothing empty of keys and coins?
- ALL liquids, aerosols, gels, creams, and pastes in 3-1-1 bag?
- Laptop and 3-1-1 bag ready to slide out?
- Phone, wallet, coins, and keys packed away?
- Boarding pass and trusted traveller card in hand?
- ID handy in case it’s needed?
12. Arrive with plenty of time to spare
Long lines are a feature of busy airports, especially during busy travel seasons and holiday periods. You might get stuck behind someone who isn’t familiar with the system, or isn’t organized. An agent might identify a prohibited item in your bag. If it’s allowed in checked baggage, there may be enough time to return to the check-in counter and check a bag. Or, there could be a mail or courier service centre within the airport to have the item shipped.
13. Have travel documents ready
The only documentation needed at a screening checkpoint is a boarding pass. Although, I’ve encountered some systems, mostly in the USA, where a TSA agent checks photo ID at the entrance to the screening area. To use the designated screening lane for trusted travellers, you’ll need to produce a membership card (or in the USA, have TSA Pre✓ ® printed on your boarding pass).
14. Use queue time profitably
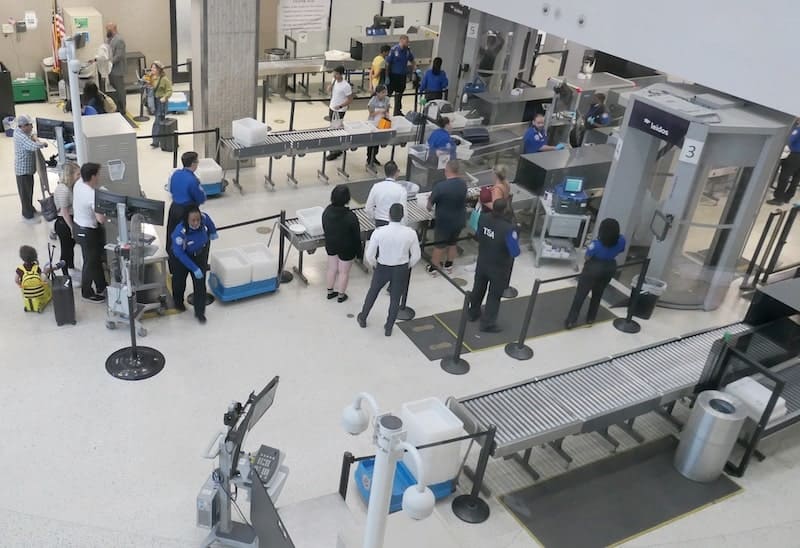
While waiting in line, look for signs displaying information about the screening process. Determine what trays and other containers are used for belongings. Observe security agents for clues on verbal instructions being given to passengers. Watch how others are placing their stuff on the conveyor belt. Luggage may have to be put in trays, or laid flat on the belt.
15. Have your 3-1-1 bag accessible
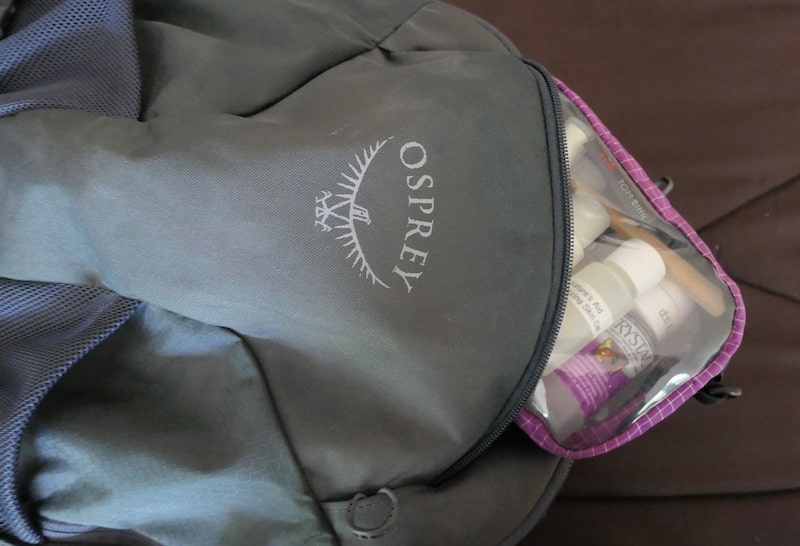
Make sure all your liquids, aerosols, gels, creams, and pastes are in your 3-1-1 bag before entering the screening area. You can transfer that small tube of moisturizer or bottle of hand sanitizer back to your pocket or purse while waiting at the gate. Pack your 3-1-1 bag in an external pocket so it’s easily retrieved, and quickly returned after being screened. If you’re looking for ideas on how to organize a 3-1-1 bag for carry-on travel, see 18 Tips on organizing a 3-1-1- bag for toiletries and cosmetics.
16. Limit individual items on the conveyor belt
Aim to pack away as much as possible in your carry-on bag(s). Passengers can be easily distracted or delayed during the process, and these are ideal opportunities for someone to make off with your stuff. Easy-to-pocket items such as a wallet or cell phone are particularly vulnerable. Besides, those trays can’t be very hygienic. I doubt they’re sanitized or cleaned on a regular basis, and many passengers use them for shoes that have stepped in goodness-knows-what. It’s not the best place to put your phone.
Prior to entering the screening area, check your pockets for coins, keys, and other metal objects and place them in their designated spots in your carry-on bags. Place your wallet or purse in your luggage. Pack away any jewellery likely to set off the security buzzer, and electronic devices. Unlike laptops, special screening is not required for smaller electronics such as notebook computers, tablets, flash drives, PDAs, or Internet-enabled phones. If you’re carrying a refillable water bottle, ensure it’s empty. By stowing these individual items in a bag, it’s less to keep tabs on, less to leave behind.
If you’re travelling with a laptop, make sure it’s charged in case you’re asked by an agent to power up.
17. Count ’em
Count how many individual items you’ll be placing on the conveyor belt. Count again at the end of the process. It’s a simple process but it helps a person stay organized and not leave anything behind.
As an example, in my case, it’s usually three: standard carry-on bag, 3-1-1 bag, and a jacket or travel vest. My packable travel purse and personal carry-on bag are nested inside the standard bag.
18. Determine the order for placing items
Place less valuable things on first (e.g., shoes, belt, 3-1-1 bag, outerwear). Put more valuable items on last (e.g., personal bag, laptop). If your jacket or travel vest contains your passport, wallet, phone, or tablet, put it on last. Zip all pockets and hide them from view. In ideal circumstances, you’ll want to pass through the personal scanner and arrive at the end of the conveyor belt in time to monitor the progress of your possessions.
19. Work with a buddy
When travelling with others, work in pairs. With your buddy, discuss what individual items you’ll each be placing on the conveyor belt so you can keep an eye on each other’s stuff. This is especially useful if one of you is selected for secondary screening.

20. Stay alert
Watch your things disappear behind the curtain. Try to time it to synchronize with your trip through the walk-through metal detector. Stay alert, keeping an eye on them as they emerge at the other end. A laptop doesn’t take long to disappear if you’re distracted, engaged in conversation, or delayed removing or putting on shoes. Put your shoes on once you’ve retrieved your other possessions. Usually, chairs and counter space are provided for this purpose. Before leaving security, check that your boarding pass in its rightful place.
Congratulations. You made it!!
For additional information, see CATSA’s (Canadian Air Transport Security Authority’s) two short videos on how to prepare for airport screening and packing a 3-1-1 bag.
If you found this post helpful, please share it by selecting one or more social media buttons. What are your tips for a speedy trip through airport security? Please share your thoughts in the comments.
Care to pin it for later?
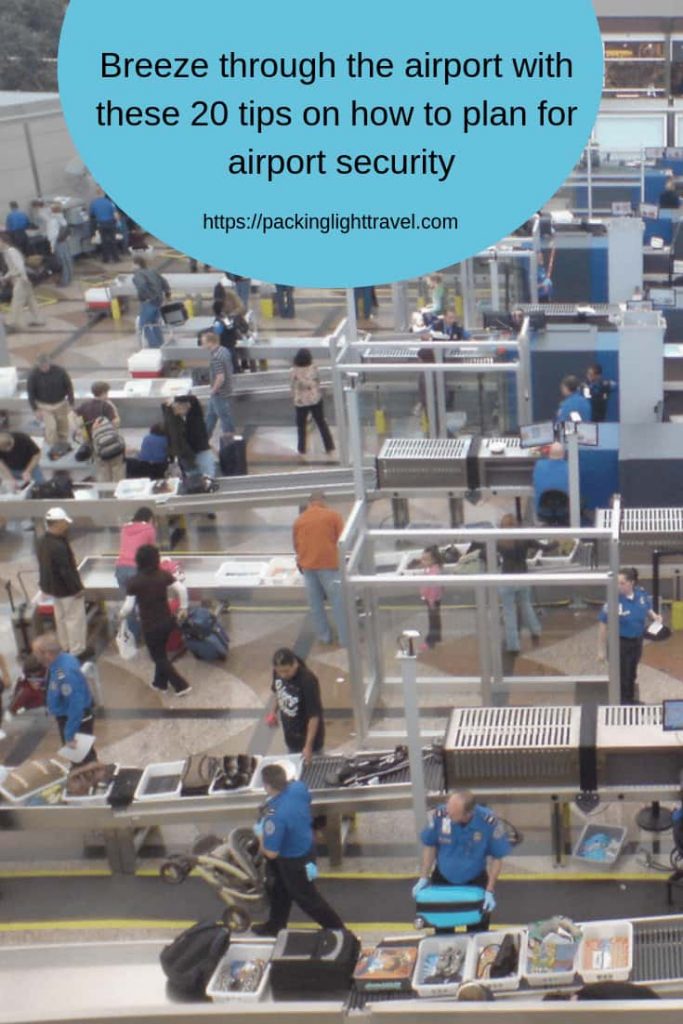 Original image from danjo paluska, flickr


What exactly is a 3-1-1bag?
There’s a separate post in the works on organizing a 3-1-1 bag and I’ll provide a link. In the meantime, it’s the bag for all liquids, aerosols and gels. No one container can exceed 3.4 oz/100 ml (“3”), all must fit in a 1 litre/quart bag (“1”) and only 1 bag per person (“1”). It’s also known as the “3-1-1 rule.” Thanks for visiting, Theresa.
Anne Betts recently posted…Reasons to shrink-wrap luggage
Great post! I try to do carry-on only when I travel. I hate waiting for checked bags at the airport, and the possibility of my bag getting damaged or not arriving on my flight is enough to make me do carry-on.
A useful article. I think we all get a bit annoyed at the airport when we have to dispose of stuff because it’s the wrong size container to get through security. Also anything that can be done to speed up the airport experience is a good thing with extra screening tests due to Covid. Thanks for the helpful pointers.
Caraman recently posted…How To Clean A Cassette Toilet In 7 Easy Steps
I always keep my passport & my airline boarding pass in my hand as I go through screening.
A few more tips:
After shaking out my water bottle and/or coffee mug in the sink (& using a paper towel to dry them a bit, if necessary), I tuck them into the exterior pockets of my “personal item” bag with the lids *off* & stowed inside, so there is no question that they are empty (since both are not transparent).
If I have a jumble of charge cords, or anything else that might look “iffy” on the scanner, I place them immediately near the zipper opening, so they are easy to access if security wants to check them out.
I put items through the scanning machine in a particular order:
1) shoes & 3-1-1 bag first, so I can quickly slip on shoes (almost always Chacos) while I’m waiting for the rest,
2) carry-on bag next, so I can quickly stow the 3-1-1 baggie inside & lift the bag to the floor, ready to roll, and
3) personal item last, so I can sling it over my shoulder and I’m off!
(I now have Global Entry, so I usually don’t even need to remove the shoes & 3-1-1, but same order applies.)